
In my first entry about cooperage, I discussed the science behind the oak that is used to make the barrels. In the second installment I discussed the actual craftsmanship involved in making the components of the barrel. In this, the final installment, I will discuss thee art behind the assembly of the barrel.
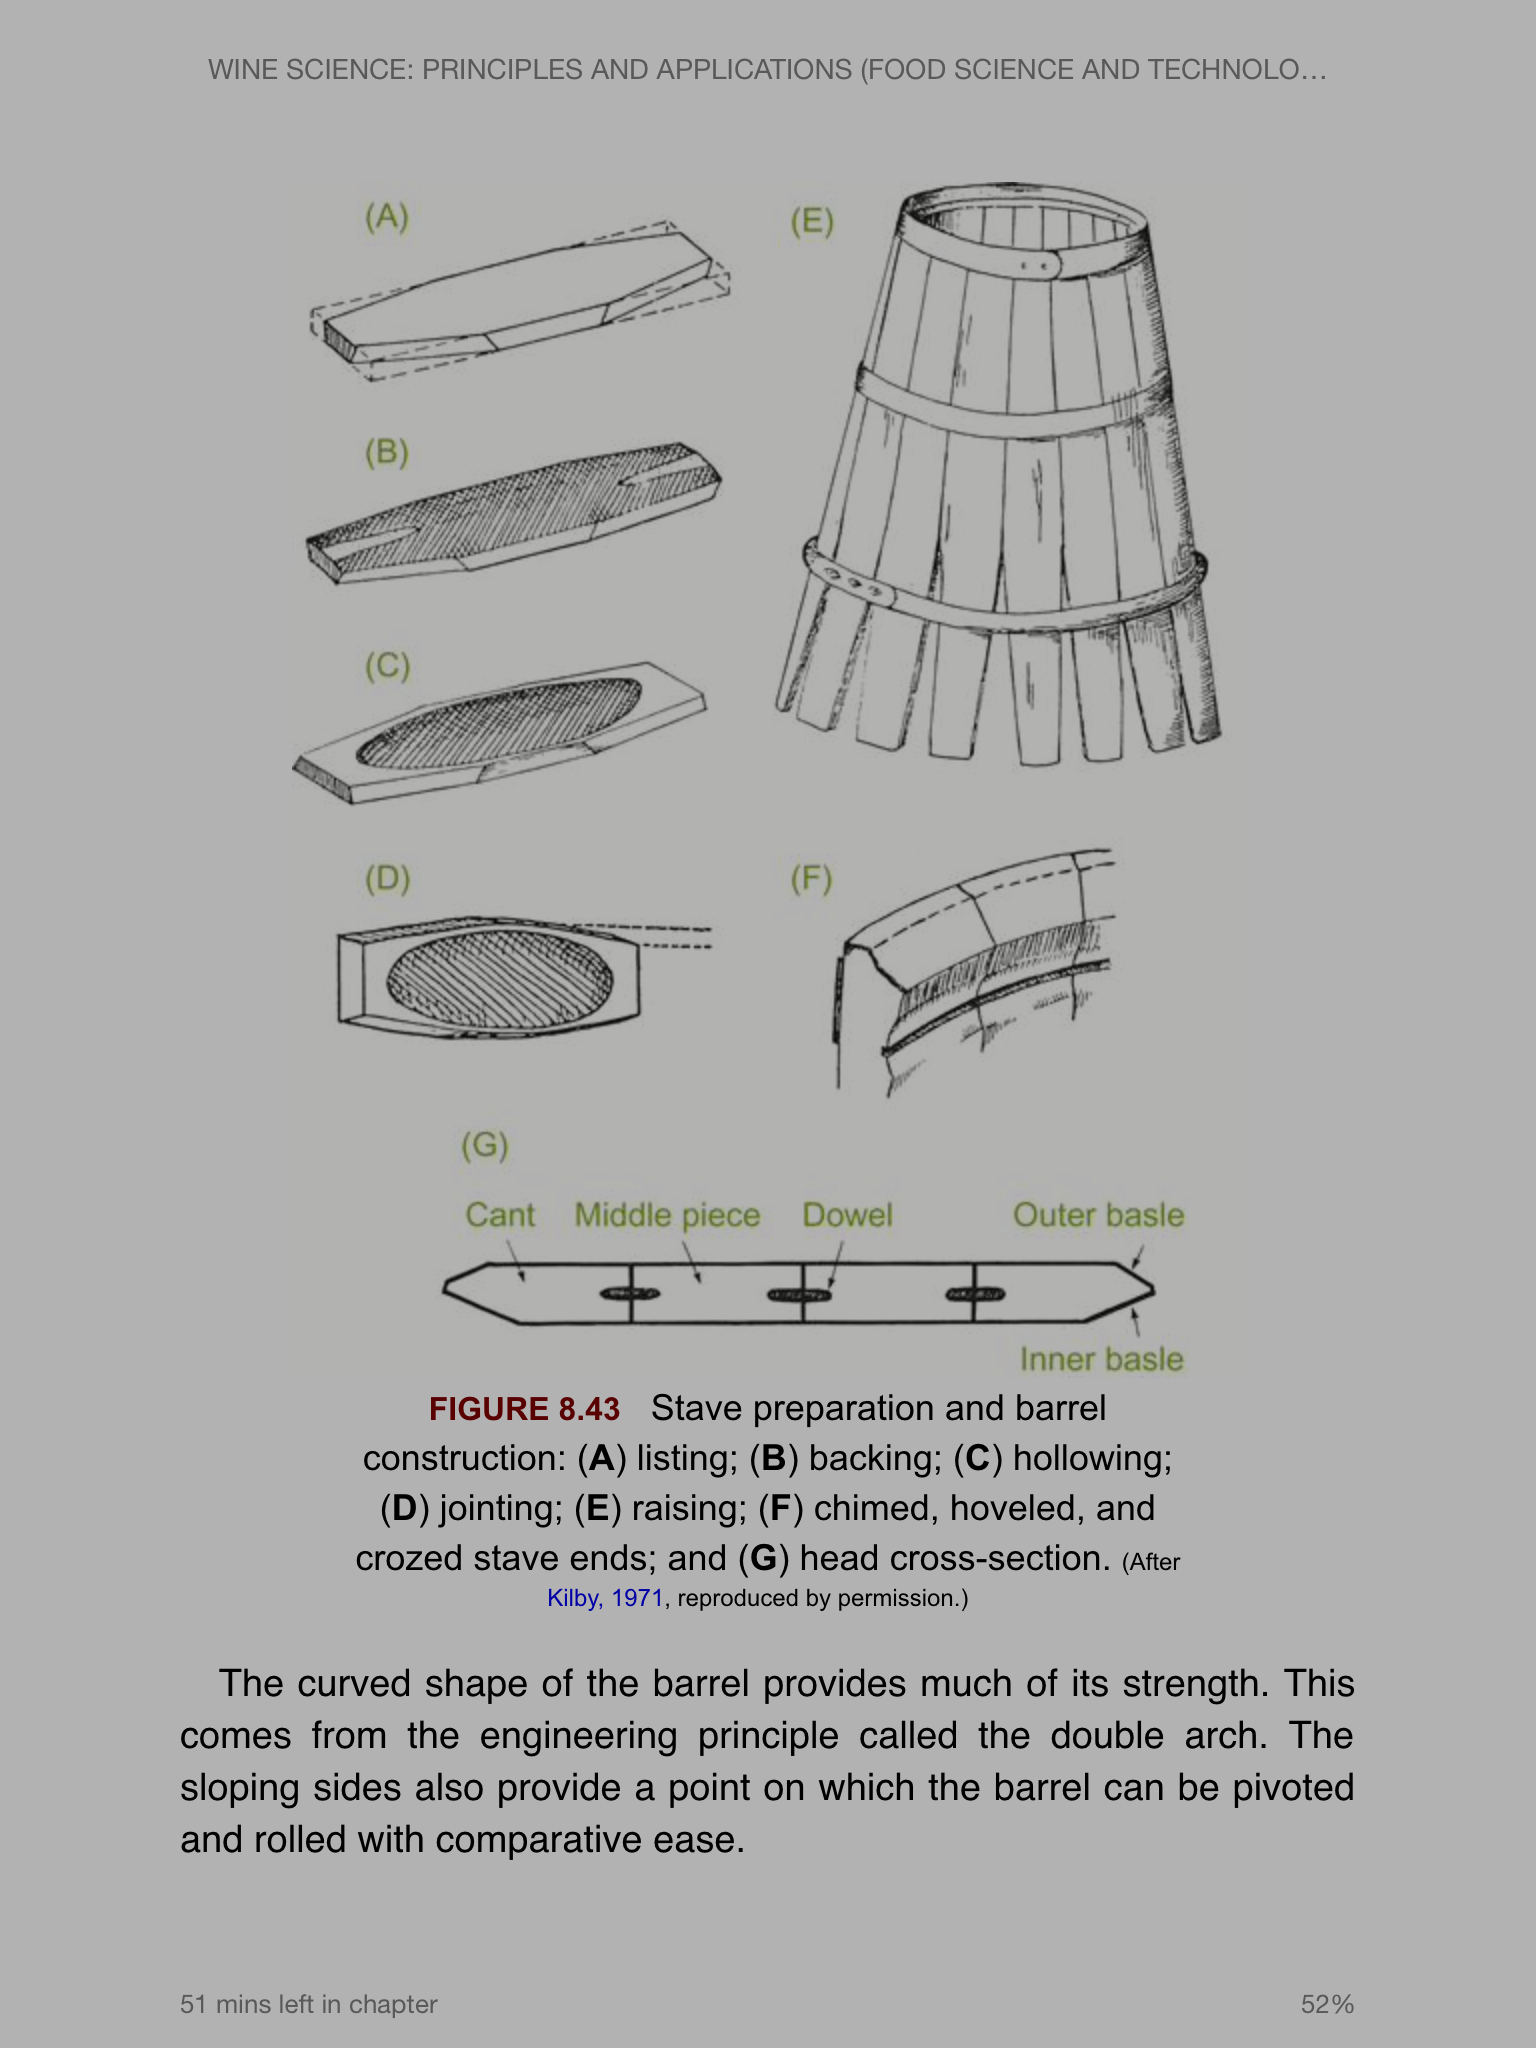
After all of the integral parts of the barrel are made, before beginning the assembly, each piece is thoroughly inspected for knots, cracks, or other structural faults. The cooper then sorts through all the staves to find the appropriate number needed for the barrel. These staves then get “dressed.” There are 4 steps involved in dressing a barrel. They include:
1 – Listing – tapers the larger ends of the staves to give the basic shape. The amount of listing is dependent on the length of the barrel.
2 – backing – chiseling of the wood from the ends of the staves
3 – hollowing – chiseling of the wood in the center of the staves to allow for the bending.
4 – jointing – using a tool called a plane along the inner edge of the sides of the stave to install a bevel. This is a highly skilled job because as you move along the stave the angles change. The bevel, again dependent on the height of the barrel is maximal at the center and least at the ends. Jointing is responsible for the tightness between the adjacent staves
Once dressing is completed, the staves are “raised.” This means that all the staves that will make up the barrel ( 28 – 32 depending on size) are placed together in an upright circle. Using temporary hoops to support them. These hoops are forced down to force the staves to begin to bend. It is then placed above an open fire for “softening.” During this period, the wood is either sprayed with water, steamed prior to being placed above the fire or submerged in hot water. These processes are done to soften the wood and limits crack formation.
Once softening has been completed the staves are pulled together while positioning temporary hoops to hold the staves in place until additional heating removes all the moisture and sets the staves in their desired curved shape. This process is called “setting.” “Toasting,” the additional heating has only been around since about the mid-nineteenth century. This is what produces the sensory characteristics of the wood. Light toasting leave the wood with its natural oaky, vanilla and coconut aromas. Medium toasting provides the vanilla roasted or a caramel character. Heavy toast gives the surface layers a smoky, spicy aspect. It is interesting that there is no industry-wide standard defining light, medium, or heavy toasting. Consequently, this can vary from cooper to cooper.
After toasting to the chosen level, the cooper will place a bevel on the inner surface of the stave ends. “Chiming,” (preparing the ends for the headpieces) involves planing the ends of the staves (the chime) and cutting a concave groove slightly below it (the howel.) An even deeper cut into the howel creates the croze and provides a place where the headings will fit. The outer surface is planed to become smooth, while the inner surface remains rough to promote wine clarification. The bung hole is bored next. Any temporary hoops are replaced with permanent ones. This usually includes two chime hoops located just below the head of the barrel; two bilge hoops positioned approximately one-third from the ends; and a set of quarter hoops placed about one-fourth away from the heads. The heads are then chosen and prepped.
The head consists of 12-16 pieces. Unlike the staves, they are straight and do not need to be beveled and receive no toasting. They are sealed to prevent leakage, and sawed. The bottom head is inserted first and then inverted to have the top head aligned. Finally, the cooper will hammer the hoops tight. This forces the staves into place and closes most cracks. After soaking for about 24 hours in water, it becomes leak-proof.
Well, there you have it. How a wine barrel is made. This was only a brief look into the art and science of the process, but I hope you enjoyed it and learned a little. As a conclusion to this series check out the video below that was published by Saury Cooperage that will show you the process.
~Slainte!
~Sláinte!